Showing posts with label beauty tips. Show all posts

My Favourite Lipsticks For Spring 2015

Jan 15, 2015

Today, I'm sharing a few of my favourite lipstick picks for spring 2015! Since I've been favouring a more simple & neutral wardrobe... a bright lip is the perfect way to add a pop of colour and interest to what I'm wearing. Also, if you have any personal favourites? Please share, I always love learning about everyone's go-to essentials! And... thank you for your comments & emails regarding our move. We're getting super excited!! I'll be sure to do a post on our journey soon! 

Nars Audacious Lipstick, Annabella {Poppy Red}: Love a bright & bold red and this one is so fantastic. Plus this particular lipstick line from Nars has incredible staying power and pigmentation. Absolutely adore it!

Buxom Full Bodied Lipstick, Exhibitionist {Bright Fuchsia}: So excited to wear this gorgeous hue for my next night out. The perfect addition to a simple black lace shift and killer heels. In order to keep it modern? I'd recommend pairing it with a clean & simple eye!

Laura Mercier Creme Smooth Lipstick, Girly {Pink}: This is the perfect daytime colour. A little bit nude but still bright enough to give the face lots of colour. Also, love the olive oil and Vitamin E, it does a great job keeping my lips moisturized! So needed during these colder months!

Yves Saint Laurent Rouge Pur Couture Mat Lipstick, Rouge Rock, {Rich Red}: Another fabulous red, can a girl ever have enough? This hue is absolutely delicious and has just the right amount of richness to give a classic and timeless look. Love, love!

Yves Saint Laurent, Volupte Tint-In-Oil, My Cherie 5 {Cherry}: I've heard so many wonderful things about these lipsticks, and can't wait to nab one. Especially in the colour I've noted above. They're packed with beautiful essential oils and have a non-sticky formula. Win, am I right?! Because honestly, there's nothing worse then hair getting stuck to your lips on a windy day!

Thank you for reading friends! Wishing you a fabulous day!! xo 

Beauty | My Everyday Make-Up

Sep 17, 2014

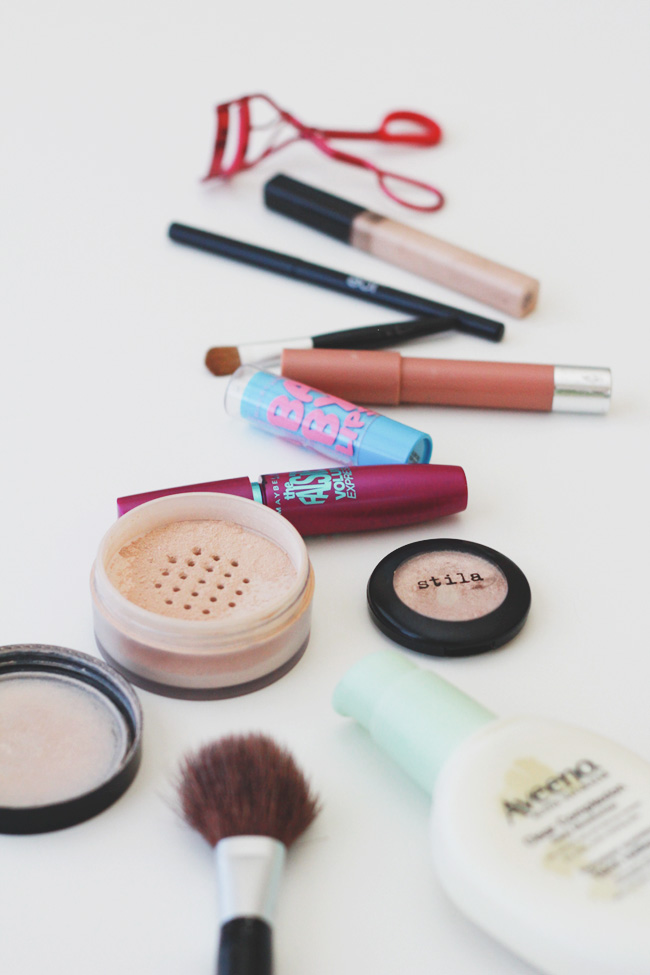
Lately, I've received several comments and tweets about what kind of make up colours & products I use. So today, I'm chatting about exactly that. When it comes to my everyday make-up, I like a routine that's quick + easy and above all natural. For fall, I'm excited to add a touch of brown shadow and plum lipstick to my make up collection, as well as a few new nail-polish colours. I'm dreaming of dark green and shimmery navy. So pretty, right?! If you have any products you'd love to recommend... let me know in the comments. I'd love to hear!


Face // I do a quick dab of Aveeno Clear Complexion Moisturizer, my Maybelline Fit Me Concealer  (it's amazing) and a light dusting of mineral foundation. I'm currently using Sia Bella Mineral Foundation and loving it. It has medium coverage and gives my face a beautiful & natural glow!

Eyes // For eyes, I apply Stila Eyeshadow in Kitten, basically all over and add a bit of black eyeliner to my top lid. I then curl my eyelashes using Sephora's eyelash curler and pile on my Maybelline Falsies Mascara to both my top & bottom lashes.

Cheeks // I use Sephora's Baked Blush Duo in Tangerine and apply it to the apples of my cheeks. I also do a quick swipe of bronzer on my chin, nose and forehead for a little bit of extra colour!

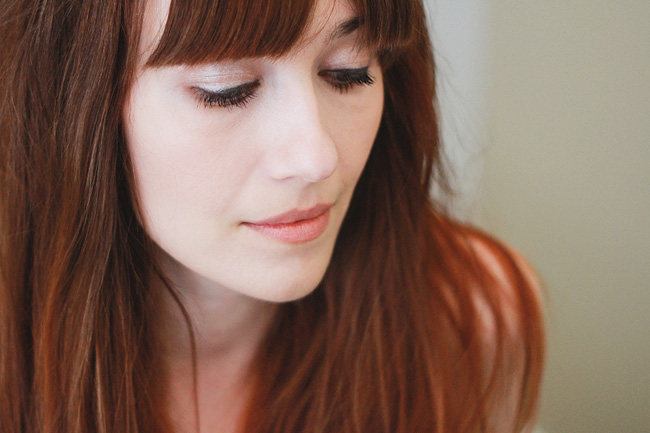
Lips // I'll either do a quick swipe of gloss or nude lipstick. I love Maybelline Baby Lips or Revlon's Balm Stain in Precious. By the way, I'm wearing Revlon in the above photo! It's one of those fabulous colours that works great no matter my hair colour, and is very much universally flattering.

There you have it my super fast and easy make-up routine. I'll be back on Friday with a weekly wrap up post. Until then, wishing you a fantastic week! xo

My Hair Care Routine

Apr 17, 2014

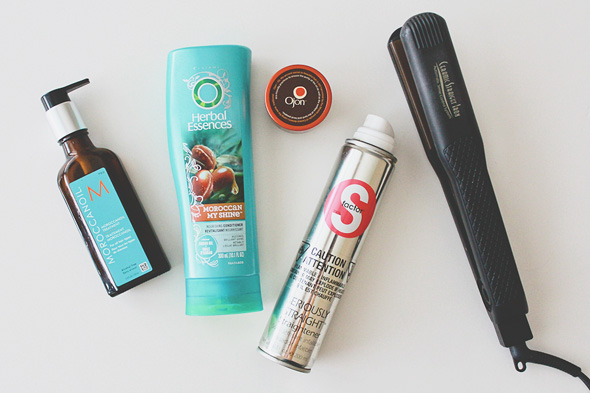
One of my top asked questions is what do I do to keep my hair shiny and healthy looking? A few years ago, it definitley came effortlessly to me but in the last year-ish it's something I've had to work at a little more. Dealing with auto-immune and malabsorption issues means I don't get all my needed vitamins. Um, which sucks. But thankfully there's a bevy of awesome products that can help you fake it 'till you make it! ;) So, with that said, here's my hair routine...

favehaircareproducts

STEP ONE: Shampoo and condition. I'm not picky about my shampoo, I use whatever is lying around, but I love a good conditioner. And the one I'm currently using, Herbal Essences Moroccan My Shine, is awesome. It's made a huge difference, and leaves my hair feeling & looking incredibly silky. Honestly, it's like a new head of hair. Sold! Plus, the price can't be beat!

STEP TWO: I spray on a little bit of my TIGI S Factor Seriously Straight on towel-dried hair. It detangles, moisturizes, helps fight frizz and keeps my hair from turning all wavy & crazy until my next shampoo. Perfect for girls with blunt bangs, which I'm thinking of doing again. We'll see.

STEP THREE: After a quick blow-dry, I straighten my hair using my NP Group Ceramic Flat Iron. It has ceramic plates and uses negative ion technology, both of which leave my hair smooth and silky. I've used other high quality straighteners and this one is miles apart. I definitely recommend it.

STEP FOUR: Refresh wine glass. Haha yes, spa nights always lead to a few glasses of wine. For my final step, I apply a dime sized amount of Morrocon oil to dry hair. I know most people use it on wet hair but I like to use it to tame any flyaways and condition my hair, especially my ends.

► Lastly, once a month I use Ojon Restorative Hair Treatment. I started using it last year after my hair was getting pretty damaged, and it saved my hair! I apply it in the morning, pop my hair in a top-knot (perks of working from home) and then rinse in the evening. Have any hair questions? Leave them here or tweet me! xo

Quick & Easy DIY Exfoliant For Glowing Skin

Mar 20, 2014

diyexfoliant

Lately, my skin's been feeling a little drab and I've been on the hunt for a DIY exfoliant. Let me just say, this one is ridiculously easy and works amazingly well. I'm a firm believer that good skin care does not require tons of money and can be accomplished on any budget! I've been diligently exfoliating every morning and my skin looks so healthy + a lot of my blemishes have cleared up. I couldn't be more excited by this easy and way affordable DIY exfoliant.

You'll need:

Your favourite cleanser
Baking soda
Bowl
Mixing spoon

Mix your cleanser + baking soda in a glass container (mine comes with a lid for easy storing). Apply a dime size or so to a clean face, then gently work in a circular motion. Rinse well with warm water. Dry with a face towel and apply a daily moisturizer. Voila! I promise, your skin will thank you!

DIY: Long Lasting Manicure

Mar 6, 2014

I can't believe it. 7 days & counting and my DIY manicure is still in place. Success! I'll be commenting specifically on the products I used in next week's video haul, so look out for that. But in the meantime, I'm excited to share my tips for a long lasting manicure with you. I researched, learned, and found a system that's given me great results. Side note: if you'd like a turbo fast mani, just skip steps one through three. I added them for some extra pampering but they're certainly not necessary.
Step one: File. Make sure to start with dry nails and file in one direction. Filing nails in two different directions can weaken them.
Step two: Apply your favourite hand moisturizer and then soak your nails in soapy water. I do one hand at a time so I can sip wine and browse instagram. Obviously! ;)

Step three: Push your cuticles back. I ended up using my nail file, but if you have a cuticle tool, then use that. However, my method worked just as well!

Step four: Use a quick dab of nail polish remover to remove any excess oils. This will help the polish last longer.

Step five: Brush on two even coats of polish, but not too thick. Quick tip? I love using metallic colours because I find they are much less prone to chipping.

Step six: Last step, apply your top coat. This will extend your polish for days. To help improve the lifespan of my manicure, I also avoid long baths for 24 hours. Keep your hands dry, as it allows the polish to set. Lastly, I apply a second top coat the next day!

If you have any tips of your own, please share! I'm determined to keep perfecting my skills! xo

Products Used:

Nail polish: Sally Hansen, Diamond Strength in Champagne Toast
Top coat: Revlon, No Chip Top Coat
Hand cream: L'Occitane Hand Creams
Hand soak: Philosophy, Amazing Grace Bath/Shower Gel

diy moisturizing mask

Nov 7, 2013


Hello! Today I wanted to share a really simple mask with you guys. You'll need some plain yogurt (I use a higher fat Greek yogurt) + honey and freshly squeezed lemon. This is a great mask for stimulating collagen production, tightening pores as well as adding tons of moisture to your skin. I did this mask just last night and loved the results. I also finished it off with one of my favourite moisturizers, Bio Beaute by Nuxe!

You'll need:

- 2 tablespoons plain Greek or high fat yogurt
- 1 tablespoon honey
- 1 teaspoon lemon juice

Mix your ingredients together until well blended and smooth. Apply to a clean and dry face for about 10-15 minutes. Then wash off with a warm washcloth. Your skin will feel so fantastic!

diy polka dot manicure

Jun 27, 2013

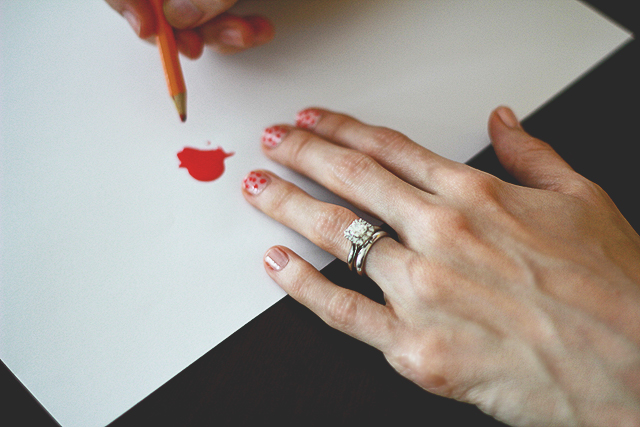
1) You'll need a base coat, top coat (for the polka dots) and a pencil. I also like to have Q-tips & polish remover handy... perfect for quick touch ups.
2) Apply your base coat.
 3) Now dab your pencil in the polish and use a gentle hand to apply your polka dots.
4) And voila, all done! 

Well, I guess my polka dots aren't exactly perfect, but still, I was excited to give this fun polka dot manicure a try. I found it via Pinterest and the original content is from Syl and Sam. Next time, I'd love to do a mint + white or use a grey base coat and add neon yellow polka dots. Sky's the limit, really. If you guys try this, be sure to let me know... I'd love to see your results!

xo veronika

diy at home facial

Apr 15, 2013

Yup, here I am... makeup-less and with goop all over my face. Ha, all for a good cause though, as I wanted to share my favourite at home facial tips with you today. I discovered these tips via Lauren Conrad's blog and have been hooked ever since. As much as I love getting facials, it's not always in the budget, but I've found doing them at home can be just as fabulous for my skin. Here are step-by-step instructions on how you can do your own at home facial too! Enjoy, and if you have any tips, be sure to share...

► Cleanse. Remove all makeup and wash your face with a mild cleanser. I use Earth Science - it's incredibly gentle & moisturizing, which I love.

► Exfoliate. I'll either do a quick exfoliating mask, or lately I've been using a diamond infused facial peeling gel. I can't stop raving about it. 

► Steam. For this part I use a face towel... I fill my bathroom sink with warm water and soak my washcloth, I ring it out and press it to my face. I do this 2 or 3 times as it's great way to open the pores prior to doing a mask.

► Mask. I tend to do a mud mask in the summer months because that's when my skin needs the extra deep cleaning. However, for colder months I switch to a moisturizing mask instead.

► Moisturize. This is my favourite step, and I swear by Philosophy's Hope In A Jar... it does an amazing job.

xo veronika

By The Shore | Vancouver Style Blog All rights reserved © Blog Milk Powered by Blogger